
Welcome to another chess opening article! This time we will be dealing with the Four Knights Game, a well-known opening that leads to an Open game.
Open games are all the existing chess games that start with the moves 1.e4 e5. So what does this tell us about the character of this opening?
The move 1.e4 makes a clear statement: it tries to occupy the centre since the very beginning of the game. Besides this, when you play the move 1.e4, you are advancing a pawn right in front of your opponent’s King (and, of course, in front of your own King). Because of this, this move usually lead to tactical, dynamic positions.
Responding to 1.e4 with the move 1… e5 is a very direct way to fight White’s ambition: Black fights back for the centre and agrees to a complex, yet exciting, dynamic game.
The Four Knights Game is widely played among beginners and chess masters. Although it is not usually the most aggressive move order when compared to others present in Open Games, such as the Ruy Lopez, it is still an Opening that requires some study and analysis – in the end of this article, you will be ready to play it anytime you want to!
How does the Four Knights Game happen on the chess board?
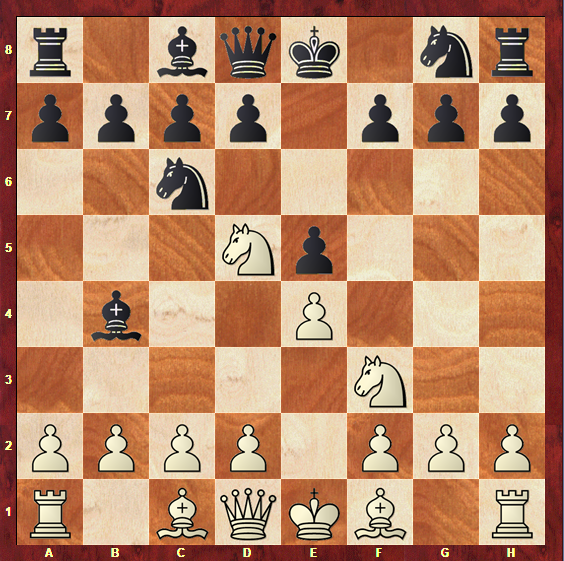
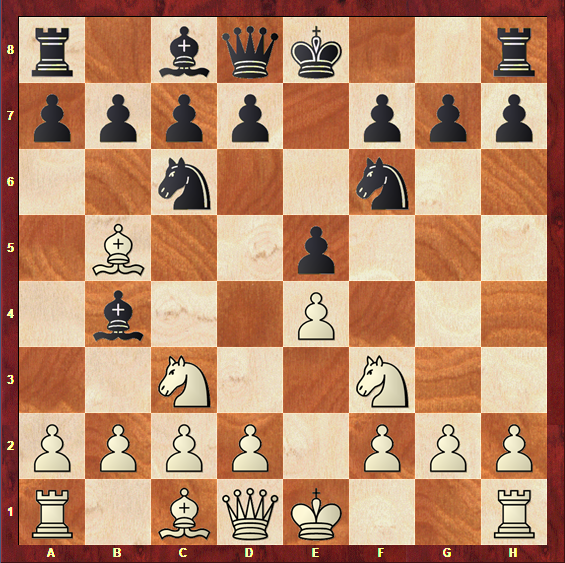
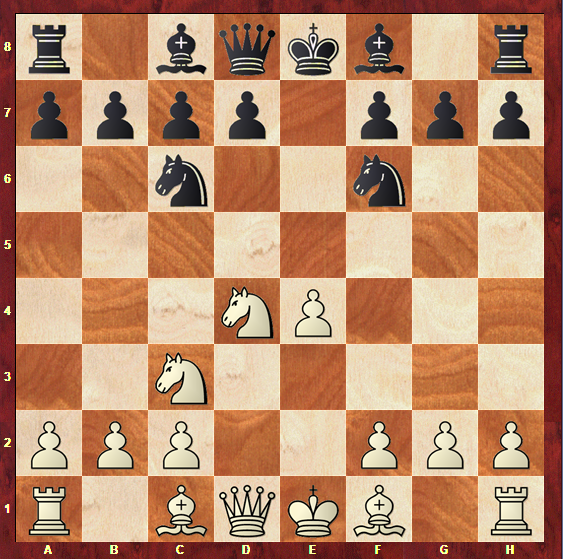
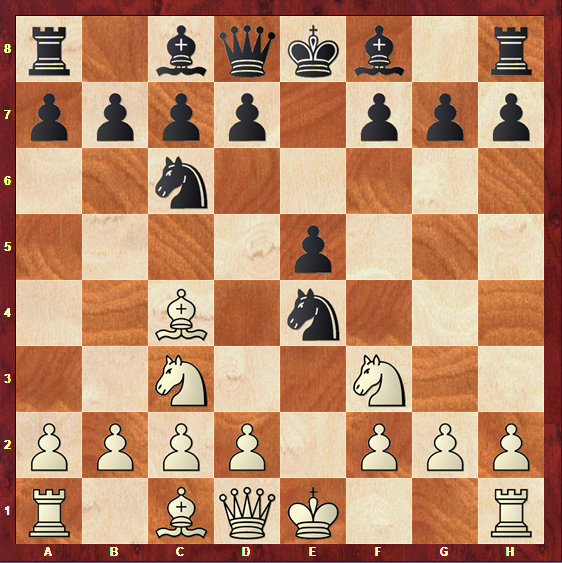
Let’s start by seeing how to get this opening on your board: The move order that leads to it is:
- e4 e5
- Nf3 Nc6
- Nc3 Nf6
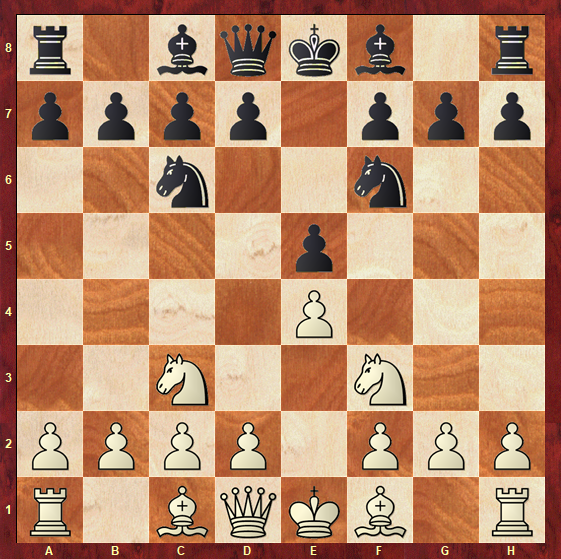
As the name indicates, this Opening has a quite singular feature: the four knights existing on the chess board are all developed from a very early stage.
You might be wondering why would someone want to develop in such a symmetrical way instead of going, for example, for a Ruy Lopez Opening, creating imbalances since the very beginning of the game. However, the Four Knights Game might be a great option for you – keep reading to find out why!
Why play the Four Knights Game?
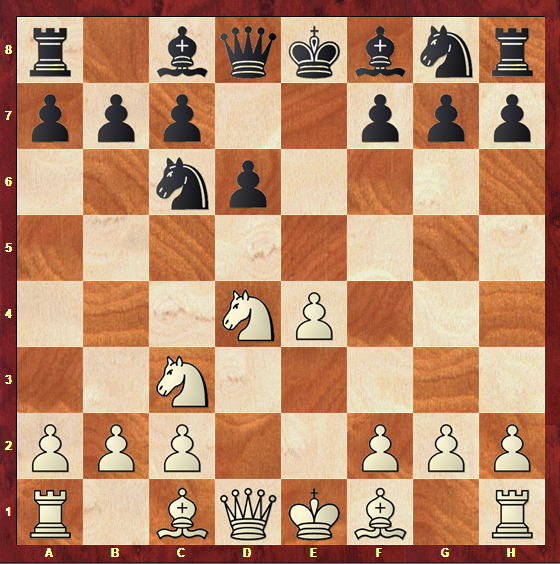
This Opening starts by White deciding to play 3. Nc3, instead of the most aggressive Openings against 2… Nc6.
Although it might not seem the most effective way to fight for an advantage straightly from the beginning of the game and directly attack your opponent’s position, the move 3. Nc3 is a logical development move – it brings out a piece and controls the important d5-square, stopping White from playing 3… d5, and protecting the e4-pawn.

The move 3.Nc3 also allows White to play in a more quiet, peaceful way if he wants to. In openings such as the Ruy Lopez or the Italian, it is really easy to get lost in the huge amount of existing theory, or to make a mistake in a very sharp variation. Because of this, if you are not a big fan of remembering numerous move orders and lines, the Four Knights Game could suit you perfectly.
Besides this, this Opening is a very flexible move order: as we are going to see later, this move order can then transpose to some variations of the Ruy Lopez, the Italian, or even a Scotch Opening! If you want to play a specific variation of one of this Openings with White which can emerge from the Two Knights Opening it can be a very smart idea to start with this move order, avoiding having to study other complicated variations.
If you are now convinced why playing the move 3. Nc3 could be a good idea, it’s time to find out why would Black answer it with 3… Nf6.
Actually, Black has other options besides the move 3… Nf6: entering the universe of the Four Knights Game is not a necessity. The possibilities from Black after the position in the diagram 1b are:
- 3… d6
- 3… Be7
- 3… Bc5
- 3… Bb4
- 3… g6
- 3… Nf6, entering the Four Knights Game
However, there is a reason why the move 3… Nf6 is far more played than the other options.
If Black does not respond the move 3. Nc3 with 3… Nf6, then we enter the Three Knights Game. Let’s analyse Black’s possibilities in this opening:
- 3… d6 or 3… Be7
This two moves will be analysed together, since the continuations and the present themes are very similar. Both these moves allow Black to respond with 4.d4

These move orders give White a good control of the centre, and a slight but steady advantage.
When Black plays 3… Be7, he is placing his Bishop in a square that is not very active. Because of this, White has a chance of successfully breaking the centre and gaining the initiative and a better control of the game.
When Black plays 3… d6, he is blocking his own f8-Bishop. Once again, it makes perfect sense for White to break the centre.
- After the move 4. d4, the most logical move for Black is to exchange the central pawns. If he doesn’t, then White would have the possibility to play 5. d5.
Allowing White to play the move 5. d5 would not be a good idea for Black. Besides gaining the control of the centre, White would force the c6-Knight to move to a worse square, for example b8. This would delay Black’s development a lot, since he would then have to relocate his knight to a good square again, losing many tempi.
After the move exd4, White would capture Back on e4 with his Knight, and these are the positions that we would be left with:
In both of these positions, White has a slight advantage, due to the control of the centre and the strong d4-Knight
- b) 3… Bc5
This move attacks the weak f2-square. Besides this, it is a natural development move. However, it allows White the following continuation:
- Nxe5 Nxe5
- d4 Bd6
- dxe5 Bxe5
White is left with the centre, and it is easier for him to develop his pieces, since Black will still have to move his d7-pawn in order to develop his c8-Bishop.
Once again, this position is not terrible for Black, at all. However, it is not the most ambitious way to fight the move 3. Nc3, since it allows White to maintain a steady edge.
- c) 3… Bb4
This move develops a piece and makes it harder for White to move his d-pawn, and he would be left with a pinned Knight.
The usual continuation for White after this is:
- Nd5
This move threatens to eliminate Black’s Bishop pair, and places White’s Knight in a very central square. White’s development is a little easier. White is, again, slightly better.
- d) 3… g6
This is the second most played move (only outnumbered by 3… Nf6) against 3. Nc3.
The usual continuation is:
- d4 exd4
- Nd5

Although this is probably the most successful line for Black in the Three Knights Opening, this is not something White should worry about: these positions also have a comfortable natural advantage for White.
Black will benefit from his fianchetto Bishop, however, White has a better control of the centre, and a very well-placed Knight in d5.
This is why the Three Knights Game is not nearly as played as the move 3… Nf6. It is not a very ambitious way to develop with Black, and White should be fine in every variation. Because of this, it is not very common to find this opening being played in top-rated games.
Now that we have analysed all the alternatives to 3… Nf6, it’s time to justify why would Black want to play this move.
Besides being a very logical development move, the fact that Black chooses to maintain the symmetry of the position shows that he is ready to directly fight White’s natural opening advantage, and try to equalize the game. This move also opens up a lot more possibilities for both White and Black, since a lot of moves are possible from this position.
How does White replay to 3… Nf6?
Here are the first introductory moves that lead to the Four Knights Game opening:
- e4 e5
- Nf3 Nc6
- Nc3 Nf6
After this moves, White has some alternatives:
- 4. Bb5
- 4. d4
- 4. Bc4
- 4. g3
- 4. Be2
- 4. a3
- 4. Nxe5
Let’s analyse them one by one.
- 4. Bb5
This move is the Spanish variation. It makes it more difficult for Black to move his d-pawn, as the Knight would be pinned. It is normal if this rings a bell: the name of this variation is due to the fact that it transposes to the Berlin defence of the Ruy Lopez, which usually happens in the following move order:
- e4 e5
- Nf3 Nc6
- Bb4 Nf6
- Nc3
This variation is known for being rather quiet and solid, and because of this it is even called the “Berlin wall”. After this move, Black has some options:
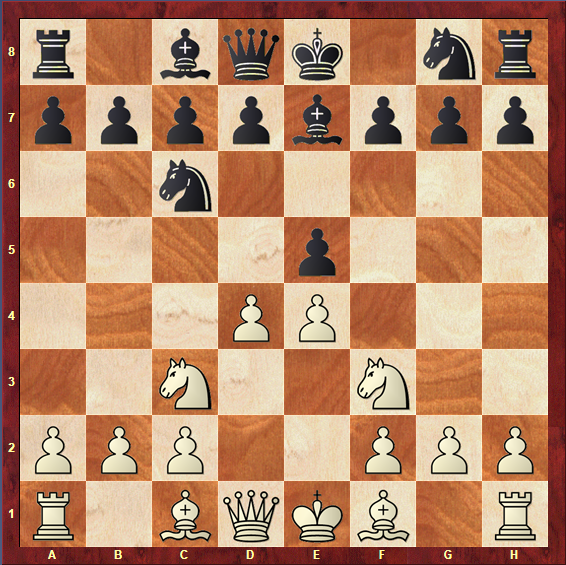
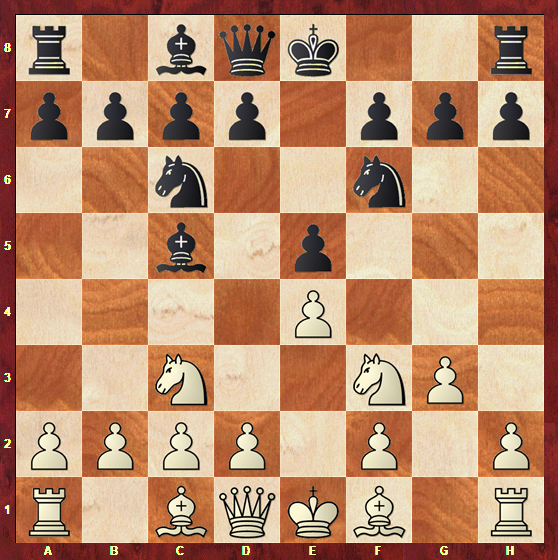
a1) 4… Bb4, the symmetrical variation
This move’s purpose is to equalize, maintaining a symmetrical position. Although a symmetrical position is not necessarily a drawish one, this variation has a reputation of not offering many chances for any of the sides. However, Black has many more aggressive options, which will be explored next.
This variation usually continues with:
- 0-0 0-0
- d3 d6
- Bg5 Bxc3
- bxc3 Qe7
The exchange of Black’s b4-Bishop for White’s c3-Knight creates some imbalances, breaking the initial symmetry. Because of this, this variation might not be as drawish as it is sometimes considered to be. Let’s analyse the most common plans in this position.
White’s Plans:
- Break in the centre with d3-d4
- Exert some pressure along the Kingside, taking advantage of the pin
Black’s Plans:
- Relocate the c6-Knight, taking it to the e6-square, where it will attack the g5-Bishop
- Control the centre with …c7-c5 after the Knight has been removed from the way
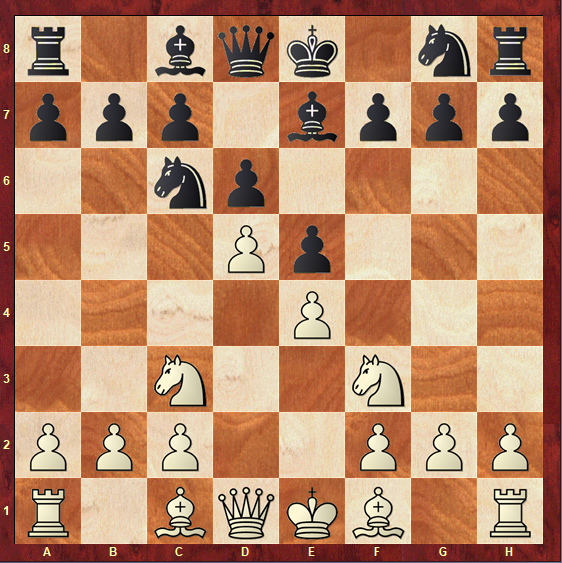
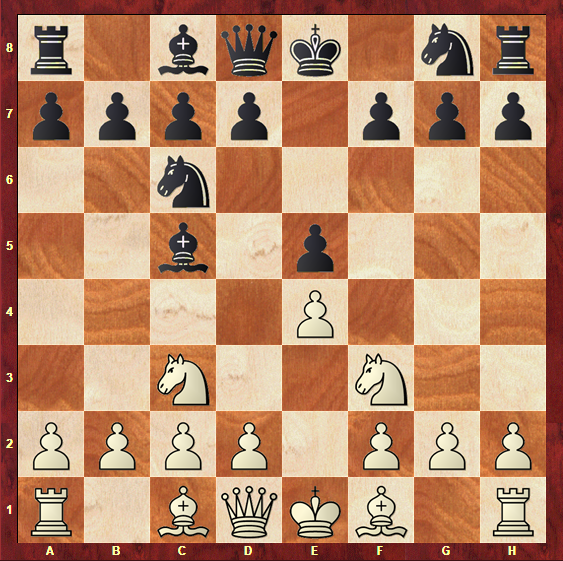
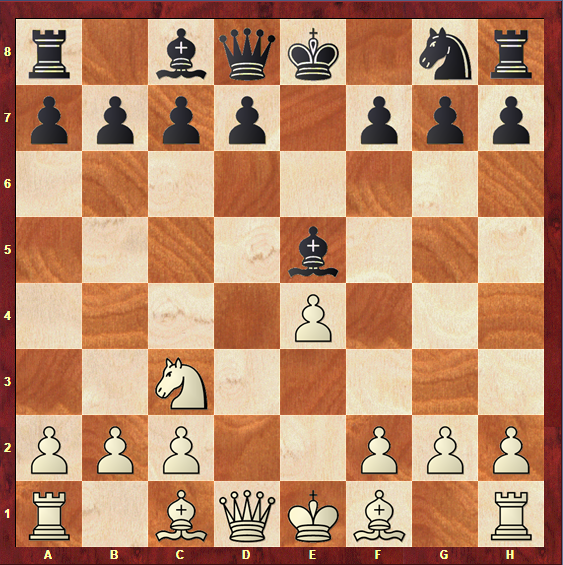
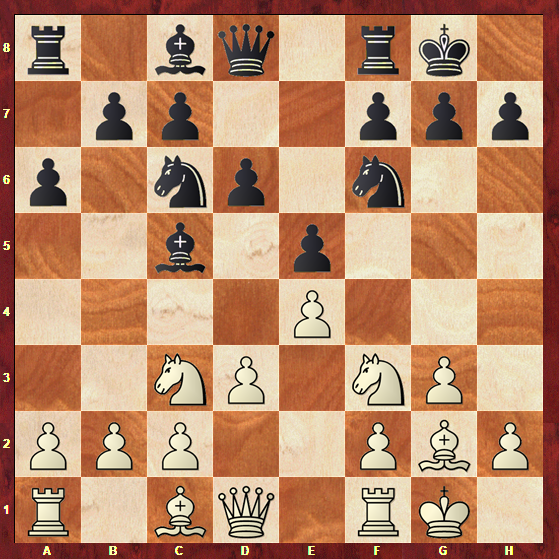
a2) 4… Nd4, the Rubinstein variation
This variation is known to be a more aggressive way for Black to play in the Four Knights Game. The move 4… Nd4 threatens to capture White’s Bishop’s pair, and places the Knight in a very central and important square. This variation usually follows with:
a2.1) 5. Ba4 Bc5
White refuses to lose his Bishop’s pair. However, this allows Black to keep developing.
It is important to note that the move 5. Nxe5 does not win a pawn, since it is followed by 5… Qe7, which recaptures the pawn.
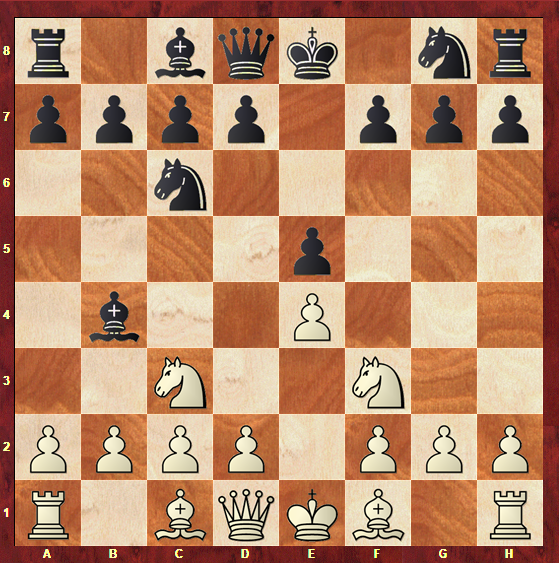
After 5. Ba4 Bc5, the opening usually continues with:
- Nxe5 0-0
- Nd3 Bb6
- e5 Ne8
- Nd5 d6
- Ne3 dxe5
- Nxe5 Qg5
White is a pawn up, but his King is still on the middle of the board. Black’s pieces are all very active. The position is complicated.
White’s Plans:
- Exchange pieces and protect his king, in order to enter an endgame with a material advantage
Black’s Plans:
- Avoid exchanging pieces
- Pressure White’s position and attack his opponent’s King
However, White has the possibility to quickly equalize the position in the Rubinstein variation after:
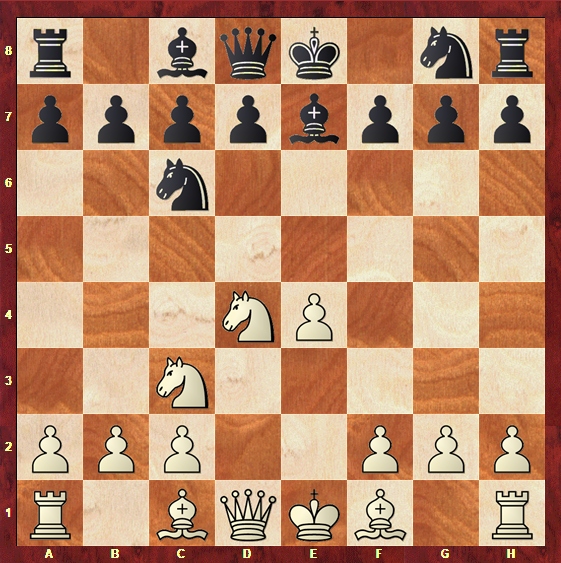
a2.2) 5. Nxd4 exd4
- e5 dxc3
- exf6 Qxf6
- dxc3 Qe5+
- Qe2
This position is known to lead to equal endgames after the exchange of the Queens.
Summing up, this variation can lead to very interesting games. However, White can force a very equal position after 5. Nxd4, so if you are not happy with a draw with Black it might not be a very good idea to play the Rubinstein variation.
Now that you are aware of Black’s options in the Spanish variation, let’s move on to other options White has in the fourth move.
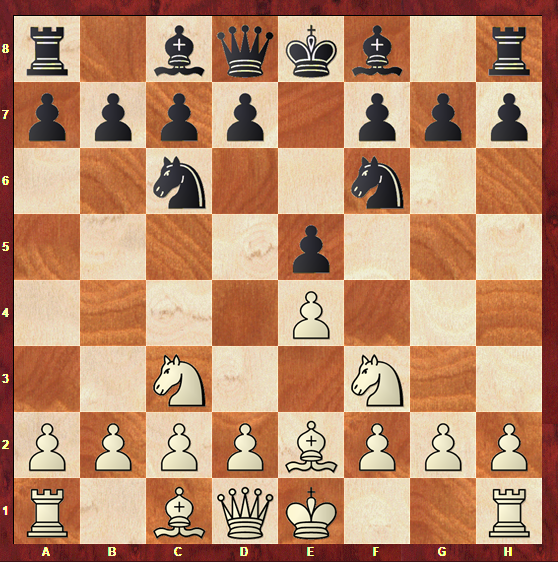
- b) 4. d4, the four Knights Scotch
This move aims to control the centre in a very quick way, and is also usually responsible for a transposition.
This position is usually followed by:
4… exd4
- Nxd4
This position might seem familiar to you: this is because we are in front of a Four Knights variation of the Scotch Opening, which is commonly reached in the following move order:
- e4 e5
- Nf3 Nc6
- d4 exd4
- Nf6 Nc3
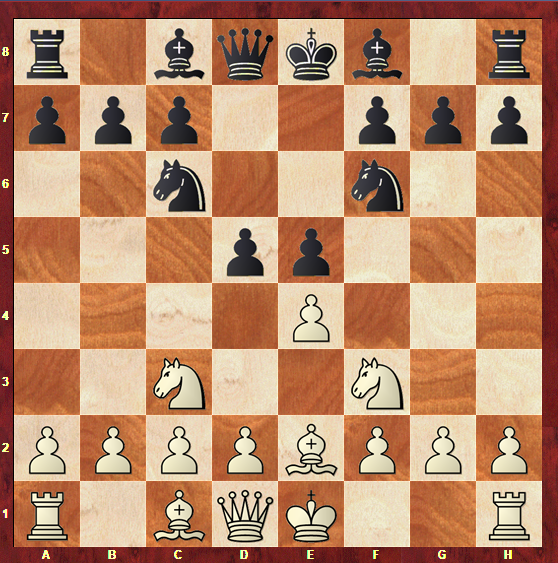
The exact same position is reached. The most common continuation is:
- Nxd4 Bb4
- Nxc6 bxc6
- Bd3 d5
- exd5 cxd5
- 0-0 0-0
- Bg5 c6
- Qf3 Bd6
This position has chances for both sides: Black has the control of the centre, even though his Hanging Pawns could become a weakness in the endgame. White as a lot of activity on the Kingside, and open and semi-open files will be explored. This position is likely to result in a very active and dynamic game, since a lot imbalances are present, which makes this a very exciting game.
White’s Plans:
- Exchange pieces and pressure Black’s central hanging pawns
- Pressure the Kingside, making good use of the pin
Black’s Plans:
- Attack on the Queenside, taking advantage of the semi-open b-file
- Make good use of his space advantage, controlling the centre
Another very common move for White in the initial Four Knights Game Position is 4. Bc4.
- c) 4. Bc4, the italian
This move is known as the Italian Four Knights Game. However, it is considered to be slightly inferior for White when compared to the Italian main lines, since the c3-Knight stops the possible c2-c3 plan of controlling the centre. Besides this, this move order gives Black some more options that were not present in a normal italian.
This position can be reached from the Italian, with the addition of the c5-Bishop, in the following move order:
- e4 e5
- Nf3 Nc6
- Bc4 Bc5
- Nc3 Nf6
Even though the move 4.Nc3 is not very common in this position, since White usually prefers to continue with 4.0-0 or 4. c3, it is completely playable. However, the Italian Four Knights Game gives Black an extra option:
- … Nxe4
Black is able to capture on e4, since he then recaptures the piece with:
- Nxe4 d5
- Bd3 dxe4
- Bxe4 Bd6
Black is left with an extra central pawn, however, the d6-Bishop is not very active. This position is considered to be equal. White is not worst, but he also does not have as much initiative as he would have in a normal Italian Opening. Because of this, the Four Knights Game would probably not be a very good option for frequent Italian players. However, if you want to avoid theory and overanalyzed lines, this could be a good choice for you.
White’s Plans:
- d2-d4 break
- attack on the semi-open e-file
Black’s Plans:
- Semi-open d-file
- Control of the centre
Now that we have analysed the most common transpositions to other Openings, let’s see some more possibilities that the Four Knights Game brings for White.
- d) 4. g3

This move’s purpose is simply to quietly develop the Bishop to g2. This fianchetto will lead to a Bishop in a blocked diagonal, not very active. Because of this, this move is not as ambitious as many of the ones seen before, and usually leads to an equalized game.
Black’s main possibilities here are:
d1)4… d5
d2)4… Bc5
Let’s analyse them separately:
d1) 4… d5
The most usual continuation is:
- exd5 Nxd5
- Bg2 Nxc3
- bxc3 Bd6
- 0-0 0-0
This position has some interesting imbalances that both sides could try to take advantage of. Black has more space, due to his e5-pawn being more advanced. However, White could try to break the centre and eliminate that advantage. White benefits from a fianchettoed Bishop in an open diagonal, though his pawn structure is weaker. Some possible plans are:
White’s Plans:
- d2-d4 break
- semi-open b and e files
Black’s Plans:
- Controlling the centre due to the advanced e5-pawn
- Space advantage
d2) 4… Bc5
This move naturally develops a piece to an important diagonal, where it can control the important d4-square and put pressure in f2.
The most usual continuation to this is:
- Bg2 d6
- d3 a6
- 0-0 0-0
This position does not have as many imbalances and activity as some of the ones we have seen before. However, it is still possible to draw some plans:
White’s Plans:
- Take his light-squared Bishop to the e3-square to support the central break d3-d4
- d5-square
Black’s Plans:
- …d6-d5 break
- control the d4-square
- e) 4. Be2
This move is considered to be quite passive and not very ambitious: the e2-Bishop is not a very active piece, and the purpose of this move is to safely castle. 4.Be2 is not very frequently played, especially among top-rated players. However, it is still worth analysing.
Both the moves 4… d5 and 4… Bb4 allow Black to at least fully equalize. White needs to respond precisely.
e1) 4… d5
This move takes advantage of White’s passivity and tries to gain the control of the centre, which makes perfect sense.
After this move, the most usual continuation is:
- Bb5 Nxe4
- Qe2 Qd6
- Nxe4 dxe4
- Qxe4
Black is left with the centre and the control of the semi-open d-file, however, White’s pieces are also active, with the exception of the c1-Bishop.
The most common themes in this position are:
White’s Plans:
- Pressure along the semi-open e-file
- b4-e8 pin
- d2-d4 break
Black’s Plans:
- control the centre with the e5-pawn
- d4-square
- semi-open d-file
e2) 4… Bb4
This move is another way for Black to play actively in order to take advantage of White’s lack of aggressiveness.
White usually continues with:
- Nd5 Ba5
- 0-0
Black’s pieces are active (with the exception of the c8-Bishop, which will be developed next) and White benefits from the d5-outpost. Capturing the e4-pawn could be dangerous due to 7. d4, followed by Bd3 and Bg5, which would allow White to quickly activate his pieces
White’s Plans:
- Playing c2-c3 followed by d2-d4 in order to control the centre
- d5-outpost
Black’s Plans:
- Pressure White’s centre once d2-d4 has been played
This positions are usually equal or even slightly better for Black, which is why 4.Be2 is not widely played.
Moving on with White’s fourth move options, 4. a3 is also sometimes played.
- f) 4. a3
This is a rather common waiting move, which oblies Black to define the position so the White can choose how to play. Besides this, this move also stops the possible … Bb4 move, which is sometime very dangerous. In this position, if White eventually plays d2-d4 or d2-d3, Black will now have the possibility to pin the c3-Knight with Bb4.
A common continuation is:
4… d5
- Bb5 Nxe4
- Nxe5 Qf6
- Nf3
In this position Black has more control of the centre, due to the advanced d5-pawn. The e4-Knight is also very well located. White is pinning Black’s c6-Knight. The development is more os less the same and the pawn islands are symmetrical.
White’s Plans:
- Control the open e-file
- Advance the e4-pawn and activate his Bishop, which could possibly go to the g5-square and attack the Black Queen.
Black’s Plans:
- Control the open e-file
- Pressure in the centre and the Kingside
- g) 4. Nxe5?
This is not a good move for White, however, it is important to know how to play against it, in case you have to face it on the chess board.
The best continuation for Black is:
4… Nxe5
- d4 Ng6
- e5 Ng8
- Bc4 d5
- Bxd5 c6
Black should now be able to normally develop his pieces. White does not have enough counterplay for the lost material.
White’s Plans:
- Play actively and try to take advantage of Black’s underdeveloped position and centrally located King
- Avoid exchanging pieces, as it would make his centre more vulnerable and decrease his activity.
Black’s Plans:
- Develop his pieces as soon as possible and protect his King
- Exchange pieces in order to enter an endgame with a material advantage
- Counterattack in the centre, using the semi-open files and possibly the …c6-c5 break.
Although this gambit is not objectively good, it is easy to get tricked in the Opening when you don’t know what you are doing, especially in blitz or rapid games. Because of this, always make sure to study possible gambits and dubious lines, even if you know they are refuted: finding that refutation under pressure on the chess board is not always easy.
Now that you know all your options in this Opening, it’s time to draw some conclusions.
Summary
Congratulations on reaching the end of this article! Hopefully you have now decided if this opening is a good choice for you, either when playing with White or Black pieces, and you have chosen a variation which fits your playing style. The truth is, in this Opening, there is a lot to choose from.
This is why it is now easy to define the opening and generalize its plans. If this will be a solid, quiet game, or an aggressive, dynamic one, depends a lot on the variation you choose to play.
White has two main choices when playing this move order:
- Try to transpose to a specific line of another opening, usually the Ruy Lopez, the Four knights Scotch or the Italian. If you are a player of one of this, you should know that there are both advantages and drawbacks to this move order. It certainly can help you avoid lots of theory and crazy variations, however, it can also give your opponent some more choices.
- Develop a quiet game with moves such as 4. Be2, 4. a3 or 4. g3. This might be a good way of avoiding studying a lot of Opening theory, though it usually allows Black to easily equalize the game.
If White manages to successfully transpose to a main line of other Opening, then logically the dynamics of the game will be the same of that same opening. For example, if White manages to transpose to a main line of the Ruy Lopez, the game will most likely be very dynamic, with lots of chances for both sides. However, if White plays a more passive move, such as 4. Be2 or 4. g3, the game could develop in a more quiet way, and it would probably be harder to create imbalances.
The reason why it is so hard to define the spirit of the Four Knights Game is because it is usually not an opening, just a different move order that can be used in a lot of different openings. Because of this, the Four Knights Game is not for a specific kind of players: from the quieter to the most aggressive players in the world, everyone should be able to find a variation which fits their taste. This versatility and infinite possibilities are what makes this move order so interesting.