
Welcome to another stop in our journey through all the 17 chess structures: we have finally reached the Slav formation.
As you probably already know, the Slav is one of the most common defences against the Queen’s Gambit. Although its name might lead you to think otherwise, this pawn structure doesn’t only come from the Slav: the Catalan, the Grunfeld and the Colle System can also lead to this formation.
If you like slow-paced strategic games, then you would probably enjoy playing this structure. The positions you will find here will certainly not be the most tactical of all, but interesting positions will surely arrive from the battle between White’s natural space advantage and Black’s attempts to break the centre and create counterplay.
The Slav formation has a sister: the Caro formation (our article on this structure is coming soon). They have so much in common that they are often referred to as if they were only one: the so called Caro-Slav formation. However, we will cover both of them separately, because the differences between them are important and should not be disregarded.
Now that you know the origins of this pawn formation, let’s find out how to play it – make sure you have your chess board with you and get ready to learn another crucial chess structure!
What does the Slav formation pawn structure look like?

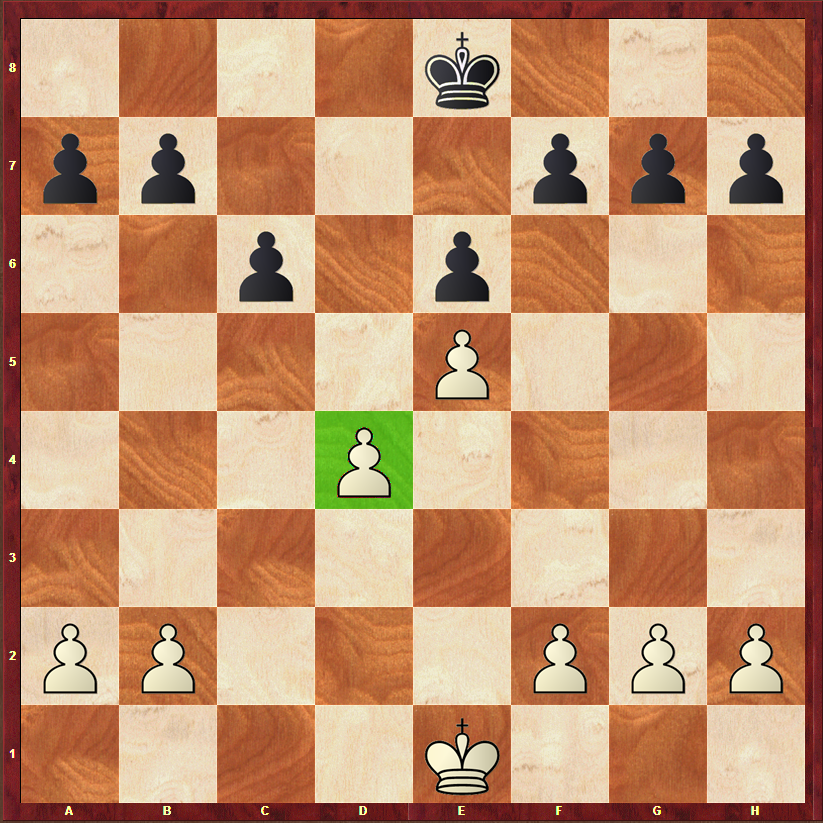
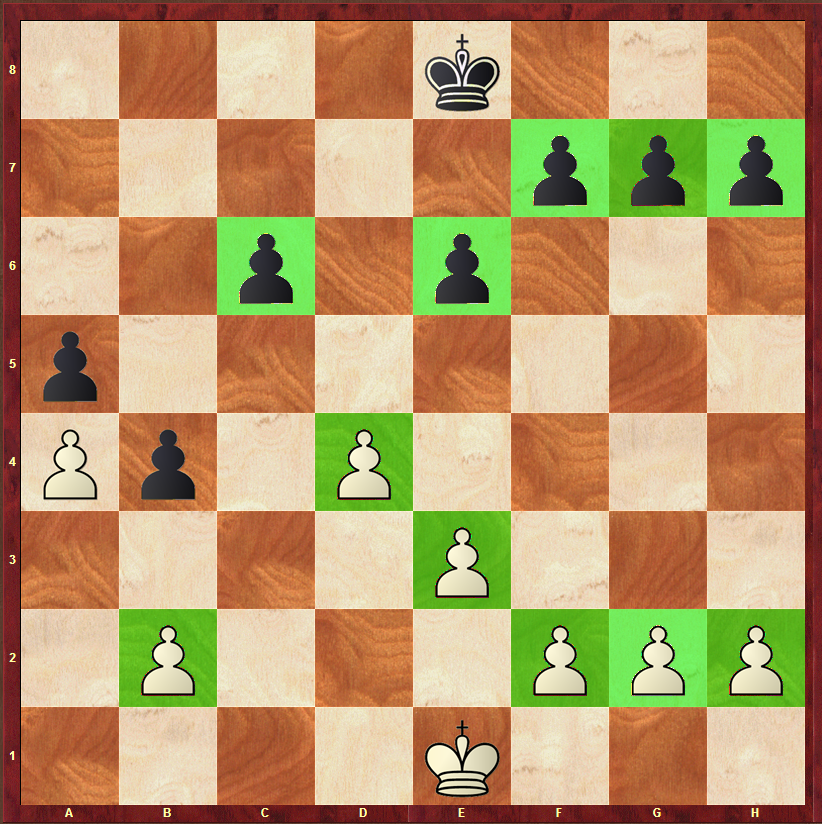
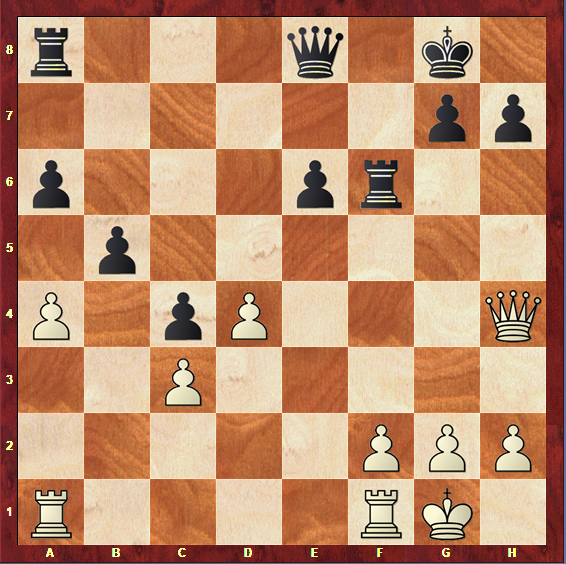
Take a good look at this position: it is the basis to all we will cover next. The fact that Black has exchanged his d-pawn for White’s c-pawn results in a better control of the centre for White. This, combined with White’s natural space advantage (due to the fact that he has a pawn in the fourth rank), leads to White having a comfortable and favorable position, and, therefore, Black has to try to find counterplay.
Note that this structure can be found with some meaningless alterations, such as the advance of some other pawns or the fianchetto. This doesn’t mean that it is not the same structure and that different plans will apply. The most important characteristic of this structure is the exchange between White’s c-pawn and Black’s d-pawn, and the control of the centre for White, with a pawn on the d4-square.
Now you might be asking yourself why would someone want to play these positions with black. Actually, there are some reasons that should be noted:
Black’s position is pretty solid: there are no serious weaknesses that White can try to take advantage of immediately. As mentioned before, this structure will lead to rather slow games.
While white cannot seem to find a way to explore Black’s position straight ahead, Black, on the other hand, must act quickly in order to deal with White’s space advantage.
You can see that Black’s c6 and e6 pawns both support the d5-square. This could be an important outpost for Black. If needed, White can always push e3-e4 and get rid of any piece Black decided to put on d5, however, as usual in chess, that might not be that simple: the advance of the e-pawn can result in the d-pawn being a weakness and Black can try to pressure or even capture this pawn.
White’s central pawn does not only provide him with a space advantage, but also with the control of the e5 and c5 squares, which are excellent outposts. Opposite to what happens with Black’s d5 outpost, if White manages to place his knights on e5 and c5, Black will have a harder time getting rid of them, once the moves …b7-b6 and …f7-f6 would leave his structure seriously weakened.
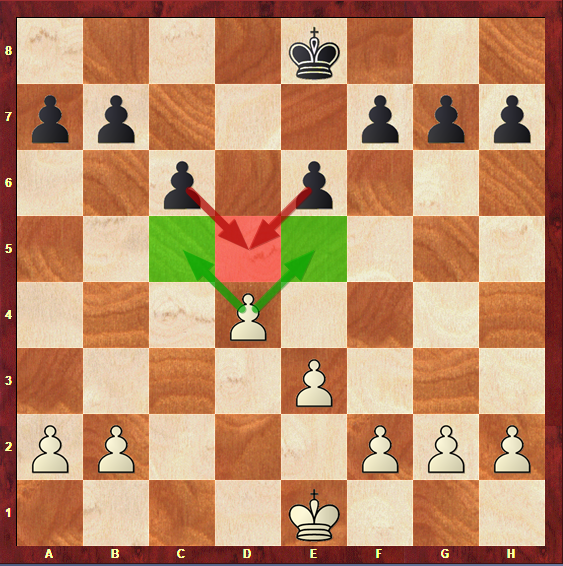
It is also noticeable that White has a majority of pawns on the kingside, and therefore Black is left with a majority on the queenside. This is the main difference between the Slav formation and the Caro formation, as in the Caro the complete opposite occurs.
Now let’s get into deeper waters in this structure and see what are the most important characteristics that define it. Keep reading, as the next section is of extreme importance and will allow you to recognize this structure on any chess board and know how to play it from both sides (with Black or White).
What are the characteristics of this pawn structure?
As mentioned before, when the exchange of the White’s c-pawn with Black’s d-pawn occurred, White was left with a majority of pawns in the kingside. This majority allows him to attack on this side of the board. This attack should be met with a cautious defence and, if possible, a central break.
It is a basic rule of chess: a wing attack should be met with a breakthrough in the centre. In order to attack on one side of the board, one needs to have a secure and solid centre; otherwise the opponent will most likely be successful with a central breakthrough. This happens because once the centre is broken apart, the pieces of the attacking side may be disconnected and exposed. In this position, White has the control of the centre, but this doesn’t mean that he doesn’t have to be careful: as we are going to see next, Black’s …c6-c5 and …e6-e5 breaks are very common themes.
Besides the fact that White has the opportunity to go straight to the point with a sharp kingside attack, he can also choose to keep things more secure and maintain his positional edge, going for a minority attack in the Queenside. A minority attack’s aim is always to create weaknesses in the opponent’s position. A common objective, for example, could be to trade the pawns in that side of the board, leaving the opponent with an isolated pawn.
Having full control of the centre, White can also try to obtain even more space with the advance of the e-pawn. This pawn could easily reach the e5 square, giving White the control of the important d6 square, weakened by Black’s pawn advances to c6 and e6.
However, as we mentioned when we referred White’s advance of the e-pawn in order to kick out a Black piece from the d5-outpost, an important possible drawback has to be taken into account: if the e-pawn goes all the way up to e5, the d4-pawn would be left backwards, and could become a target for Black to attack. (to know more about backward pawns, check out our article on pawn structures fundamentals)
Of course Black cannot simply wait for White to carry on with any of the above mentioned plans without doing anything himself. He has to try to get some kind of counterplay in order to activate his pieces and survive White’s powerful attacks.
The most common plan for Black in this position is to break the centre with either …c6-c5 or …e6-e5. If he manages to do this at the right time, it could have serious consequences for White, especially if he was already too further in the attack of one of the two sides of the board.
Besides the possible plan of placing a knight on d5, the move …f7-f5 also deserves mentioning. Though this is not the most common of the plans, it is a possibility for Black to try to gain some control of the centre in this way.

With all of this in mind, let’s now get to the section when we will see all these characteristics in practice. With all of the following top-players games, you will be able to see what are the most common plans for both White and Black, and how they work in the reality.
After getting familiar with the themes existing in this model-games, you’ll be ready to master this structure and get exciting results when playing it!
How do you play in this pawn structure?
As usually, we are now headed to the section that will teach you how to put the above mentioned plans into practice.
A great way to develop your chess abilities is to watch top-rated players’ games, if possible previously commented and analysed.
Before that, let’s summarize the plans and ideas we have been discussing in this article, and then use the games as the illustration of those plans
White’s Plans:
- Using a pawn storm in order to create a kingside attack and make use of the majority on this side of the board;
- Expanding on the Queenside, in order to gain more space or creating a minority attack;
- Advancing the e-pawn in order to gain more space and control of the centre, possibly trying to make use of Black’s weak d6-square;
- Place knights on the e5 and c5 strong outposts.
Black’s Plans:
- Breaking the centre with either the advance of the e or the c pawn, in order to disconnect White’s pieces and equalize
- Controlling the centre with the move …f7-f5
- Placing a knight on the d5 outpost
- Putting pressure on the d-file, especially on the d4-pawn once the e-pawn has been advanced.
We have now reached the most important section of this article: we will see the above plans in motion.
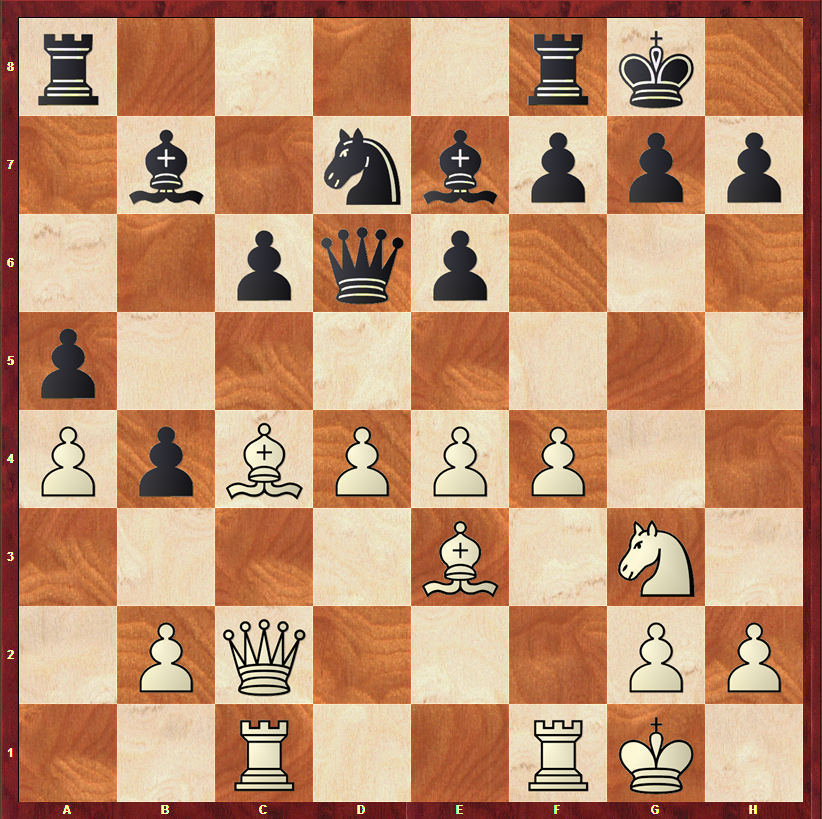
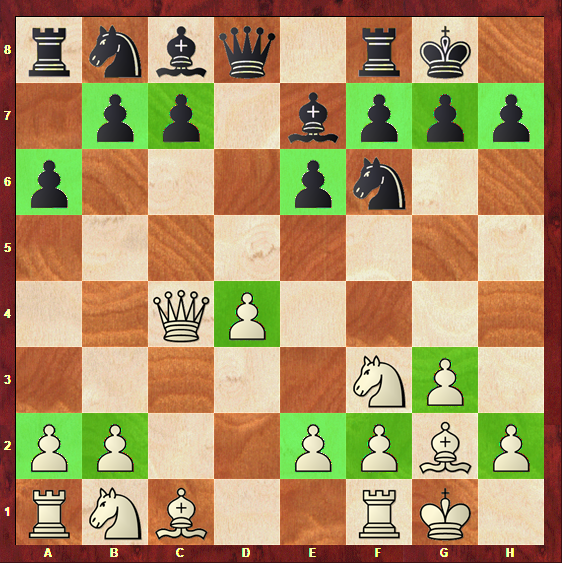
The first game will illustrate how Black cannot remain passive in this structure, and must act quickly, otherwise, he will not be able to stop White’s powerful attack. This is an example of a White’s kingside successful attack.
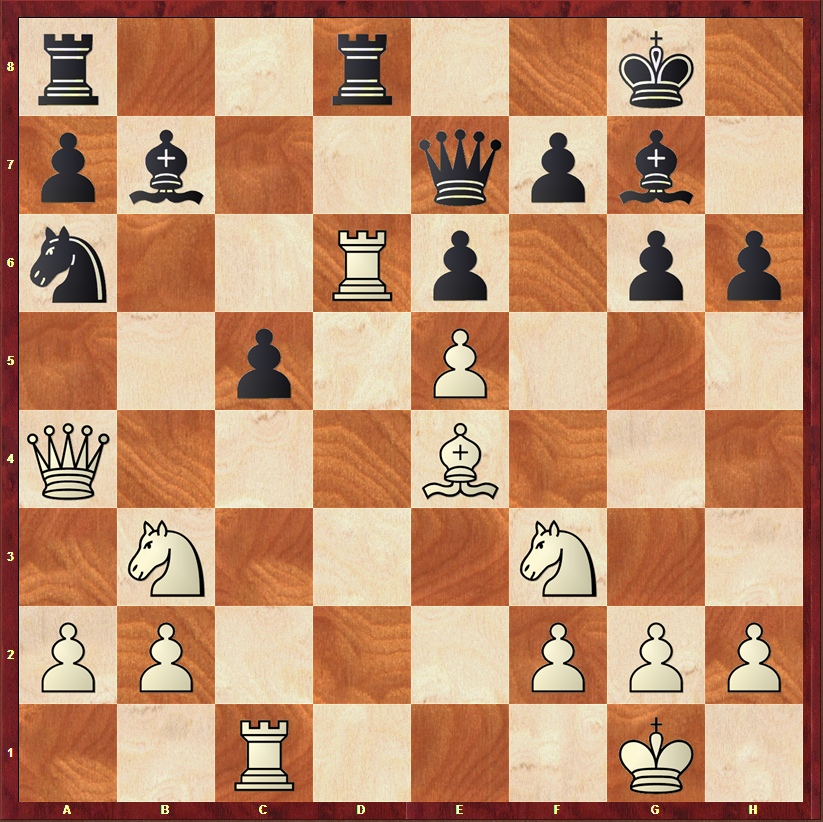
This game was played between Surya Shekhar Ganguly and Razvan-Gabriel Iagar, in the famous Tradewise Gibraltar tournament.
It starts with the following moves:
- d4 d5
- c4 c6
- Nc3 dxc4
- e3
The c4 pawn will be recaptured and Black’s e-pawn will move to e6, reaching our typical slav formation. The game continues with:
- … b5
- a4 b4
- Ne4 Qd5
- Ng3 Nf6
- Be2 a5
- Nf3 Nbd7
- Qc2 Nb6
- Ne5 Qd6
- Nxc4 Nxc4
- Bxc4 e6
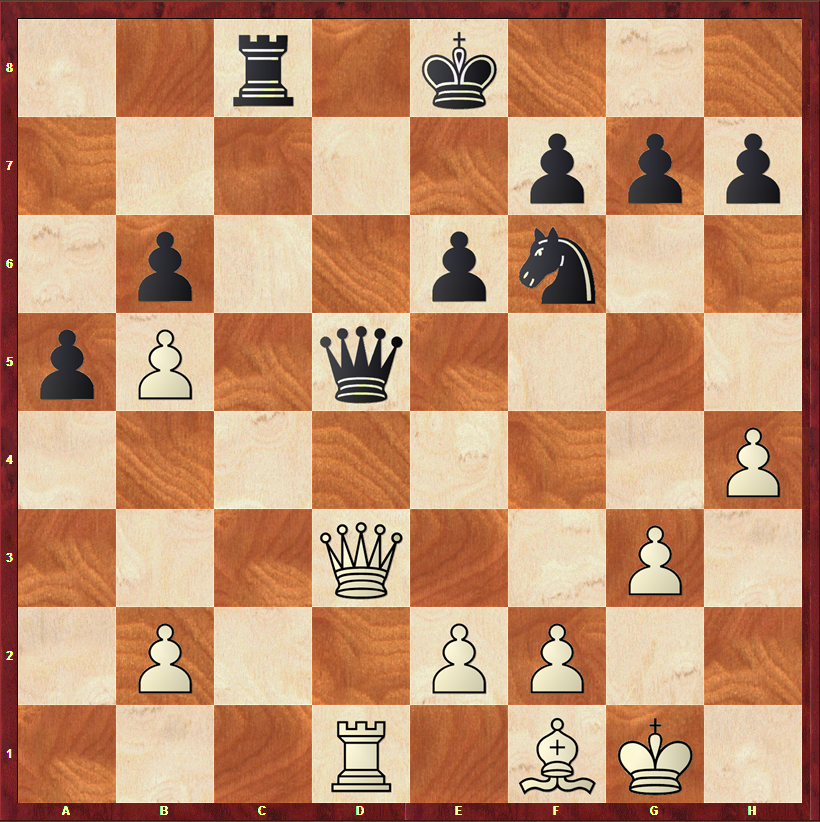
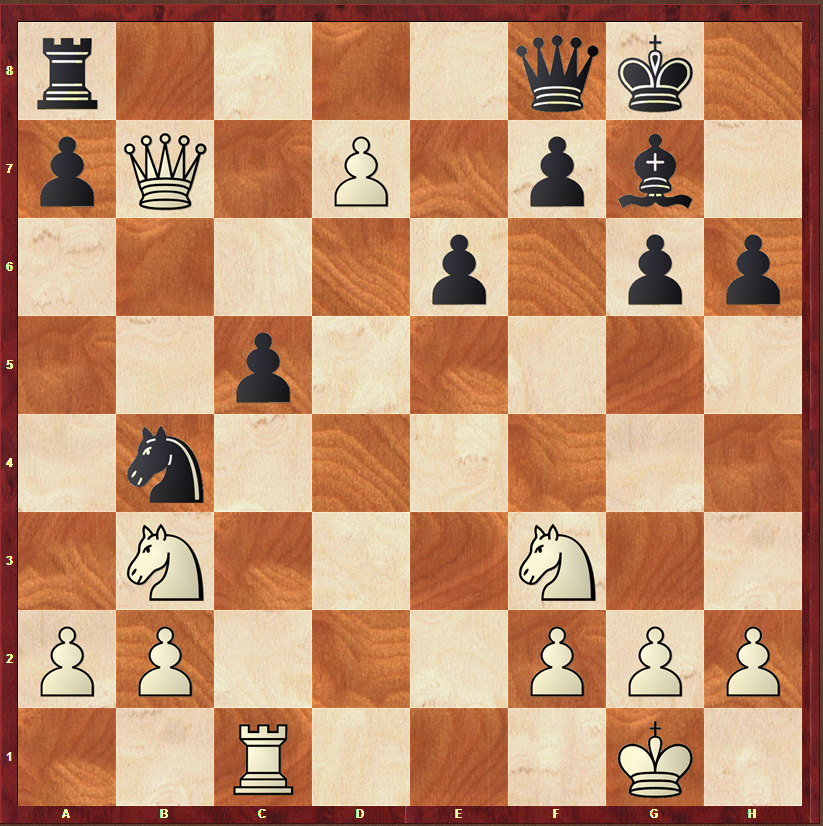
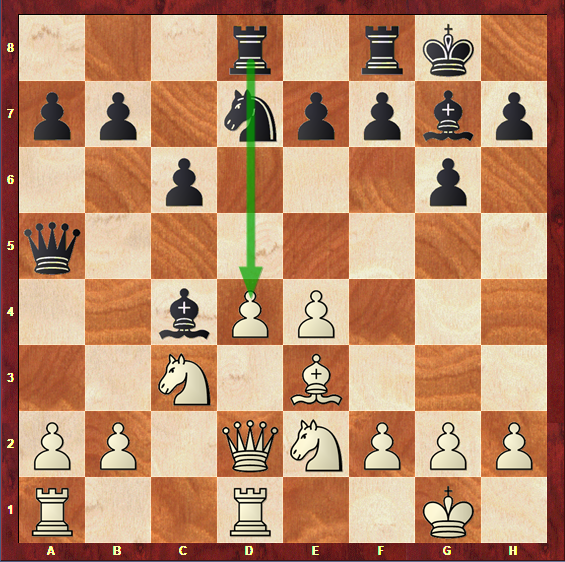
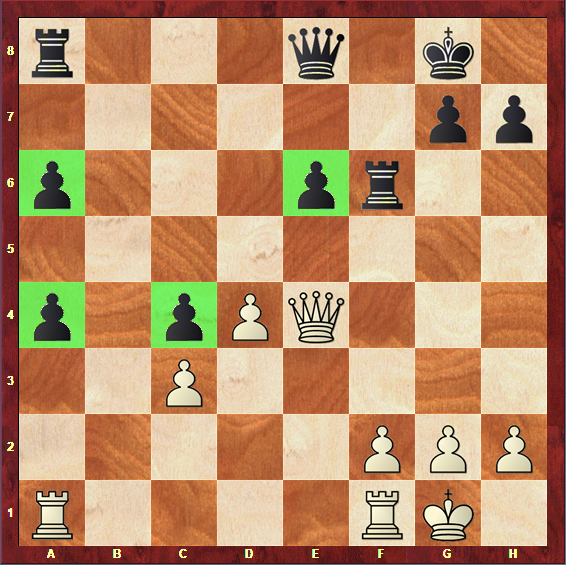
We have now reached a position in which White is clearly ahead in development. Black must waste no time and activate his pieces, and then prepare a central break.
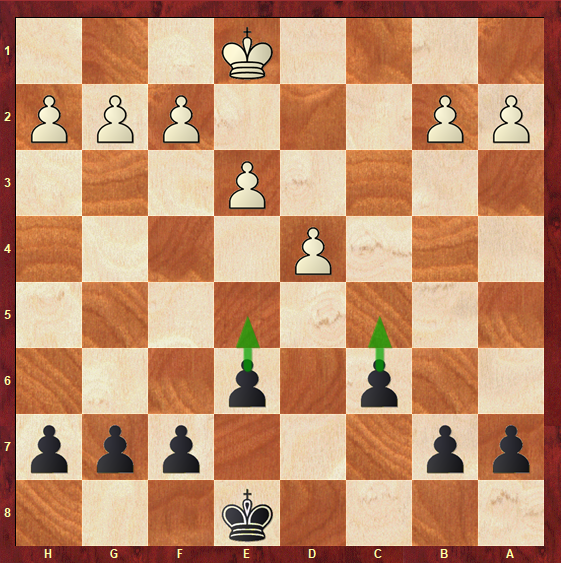
Let’s now look at the pawn structure in this position:
In green we have the pawns that are placed in the exact same spot as they were in the original structure (the one given in the first section of this article)
We can see that the only differences were the advance of Black’s a and b-pawns, and White’s a-pawn. It is also noticeable that the Queenside pawns are blocking each other, and so White’s plan of expanding on this side of the board might be compromised. Let’s see how the game continues:
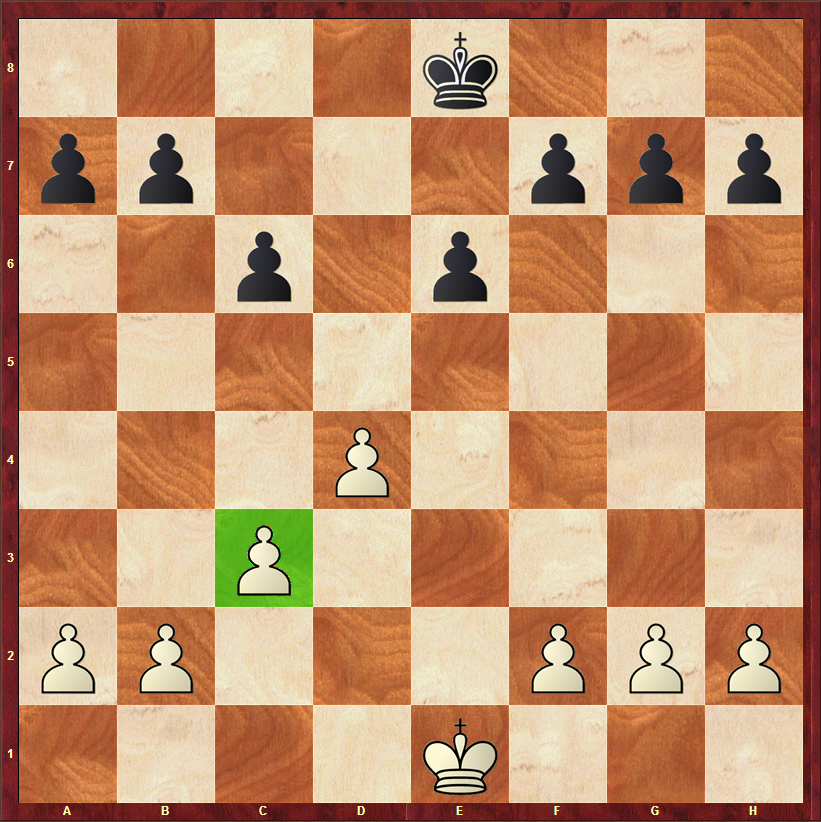
- e4
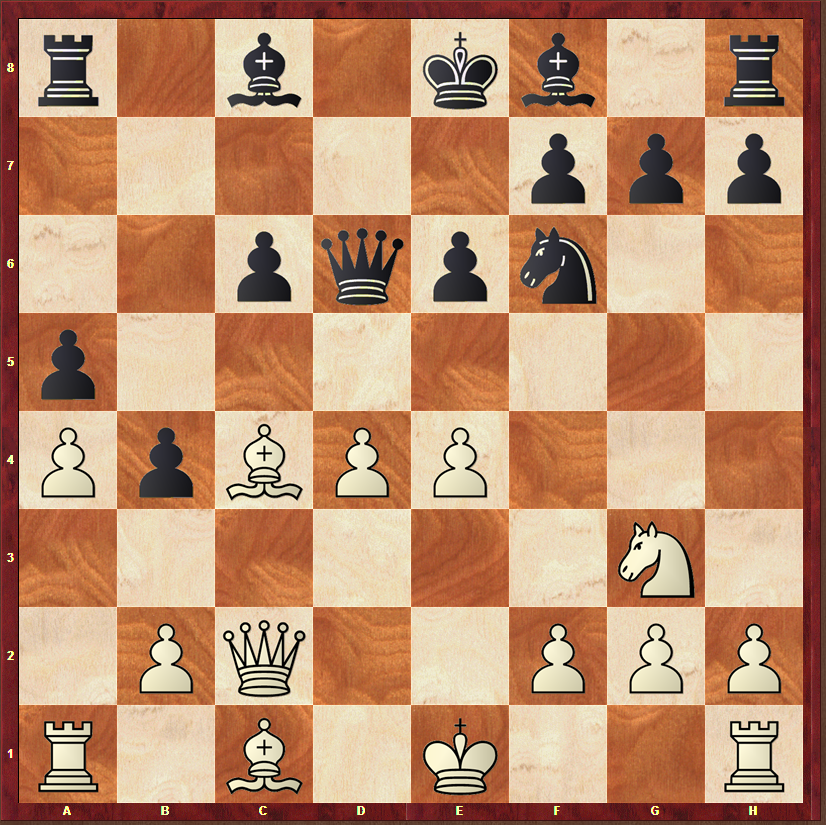
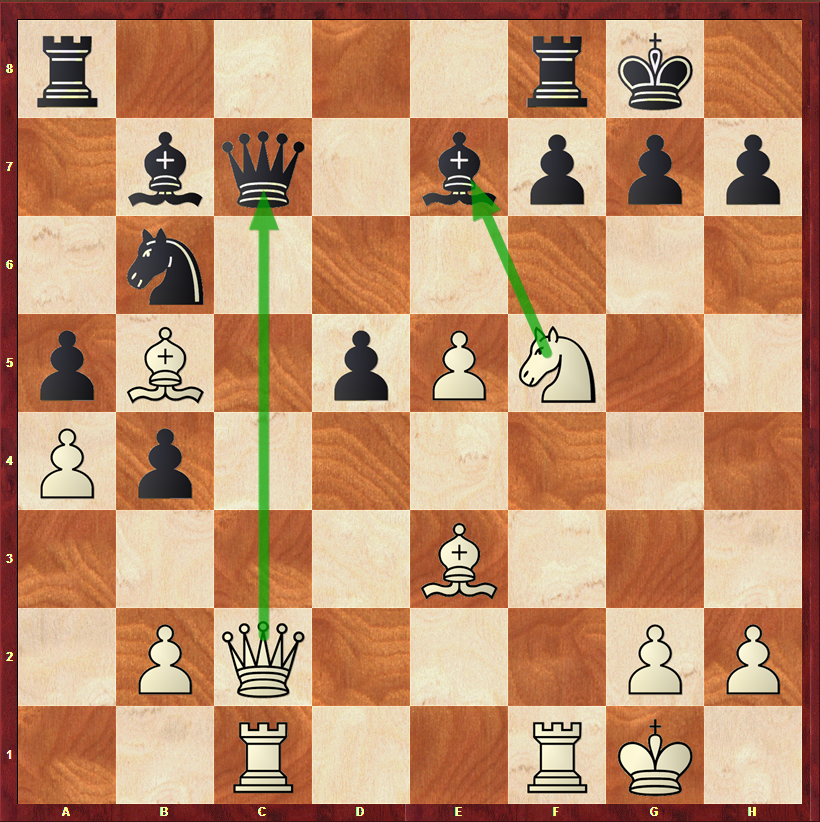
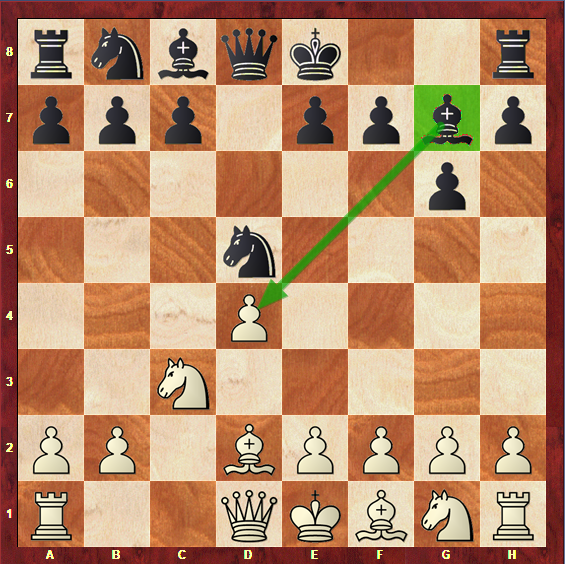
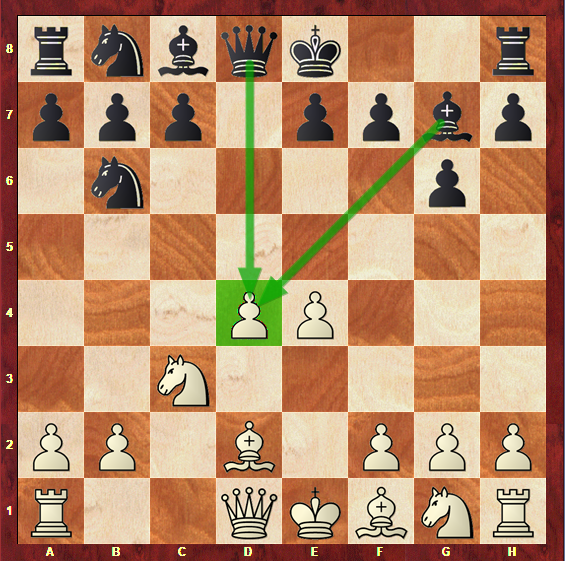
White has chosen to gain space in the centre with the advance of the e-pawn. However this leaves his d-pawn unprotected. What happens if White captures it?
If 14… Qxd4, White can respond with 15. Bxe6, threatening Qxc6.
A possible variation is: 14. …Qxd4
- Bxe6 Qc5
- Qxc5 Bxc5
- Bxc8 Rxc8
This would lead to an endgame where White has a small edge. Black probably didn’t find this endgame comfortable enough for him and decided not to play 14… Qxd4. However, this would probably have been a better choice than the move he played in the game. Let’s go back to the position in the diagram 1l.
The game continued with:
- … Nd7
- Be3 Ba6
- Rc1 Bb7
Black decided to go back with his Bishop to b7, losing a tempo that will reveal to be essential. White is even more ahead in the development, and has total control of the centre. The d-pawn is now defended, White managed to get his dark-squared Bishop out and control the semi-open c-file: everything is going well for White so far. On the other hand, Black’s pieces are mostly confined to his 2nd line and he still has the f8-bishop to develop.
The game continued with:
- 0-0 Be7
- f4 0-0
White started a pawnstorm in the kingside. This attack is already so strong, due to Black’s delay in development, that Black would be better off without castling in the 18th move, but, instead, trying to coordinate his pieces with a move like Qc7.
- e5 Qc7
- f5 exf5
- Nxf5 Nb6
- d5

White tries to open the c-file with the move 22. d5! If Black accepts this pawn sacrifice, White can move the c4-bishop, threatening both the Queen and the Bishop on e7.
Black decided not to take this pawn, and tried 22… Nxc4 instead, in an attempt to exchange pieces and slow down White’s attack. However, in this position there’s already not much to be done.
- … Nxc4
- Qxc4 Qxe5
- Bd4 Qc7
- Bxg7
1-0
White’s attack in unstoppable and there is no way Black can defend his King.
Hopefully in this game you have learned the importance of acting quickly and wasting no time for Black. White simply outplayed his opponent during the whole game, simply because his opponent couldn’t find a way to break in the centre because of the lost tempi and the poorly placed pieces.
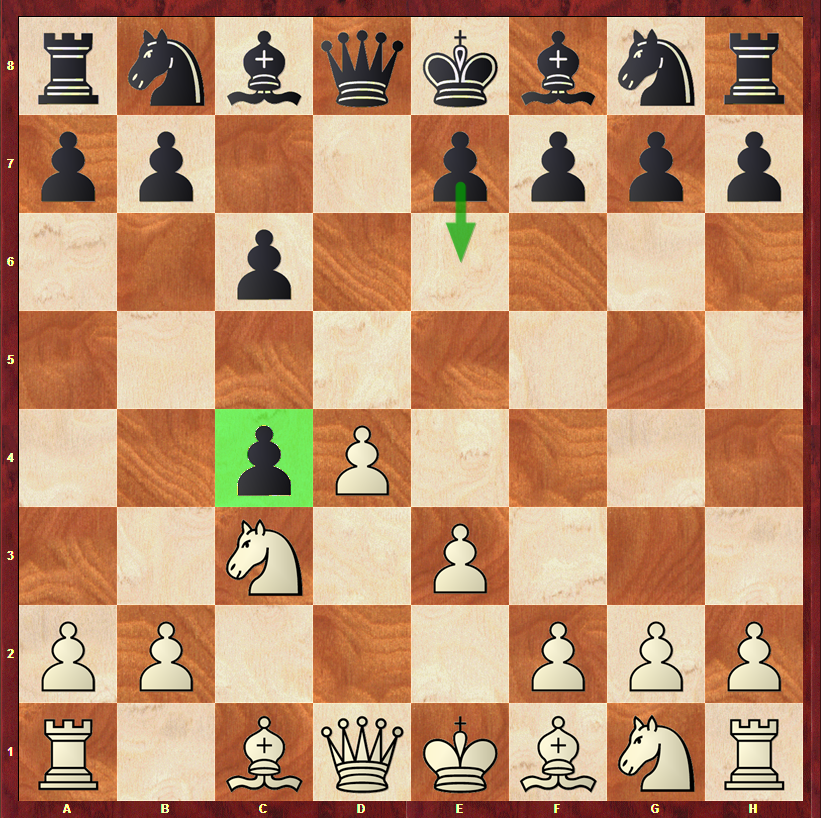
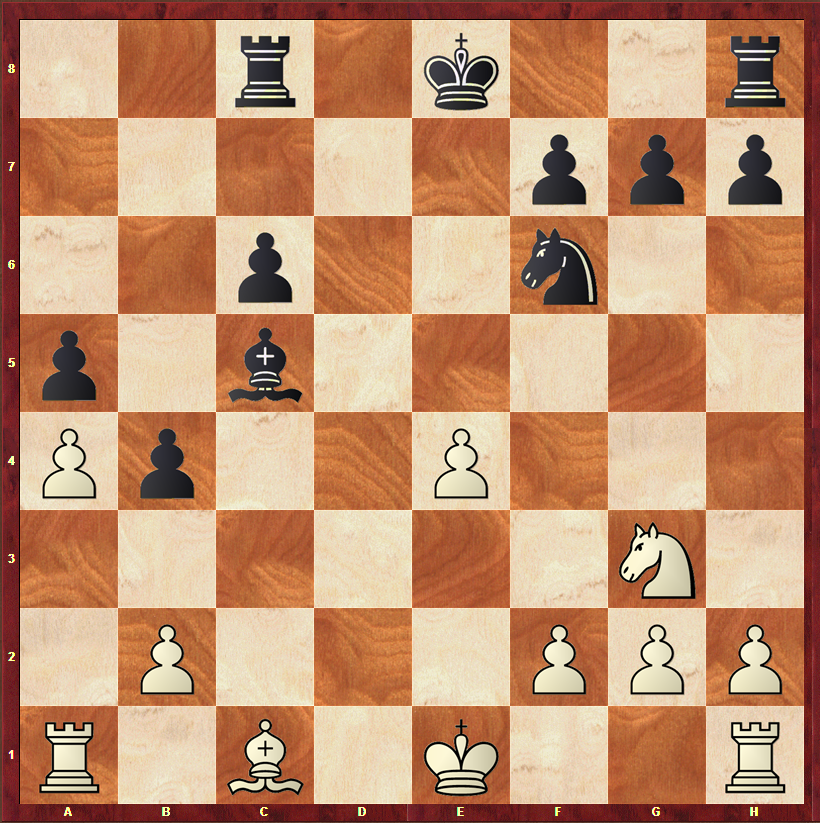
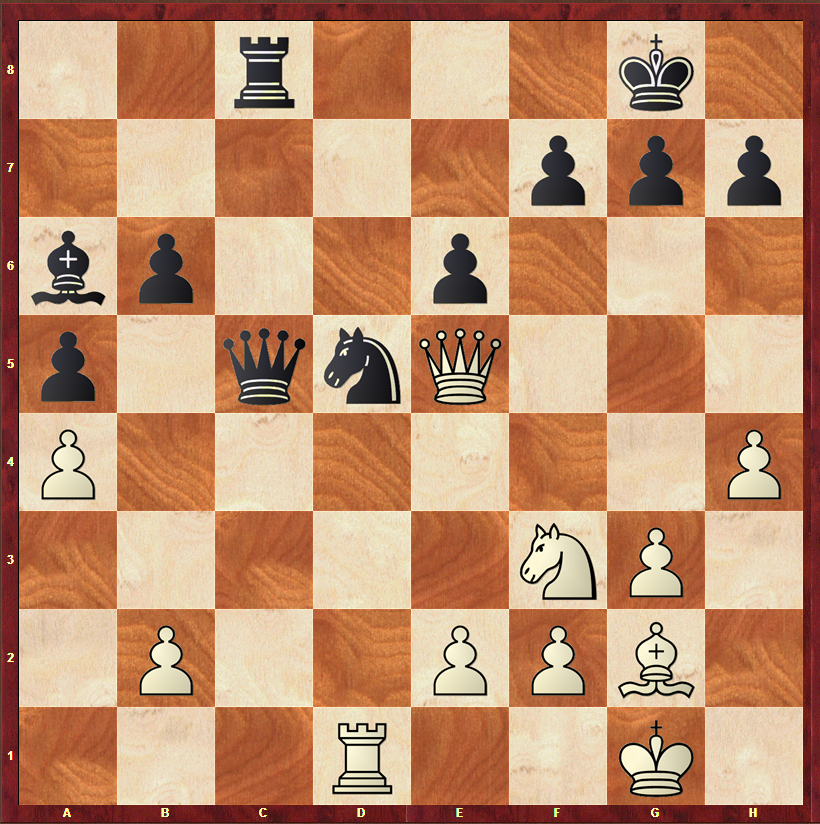
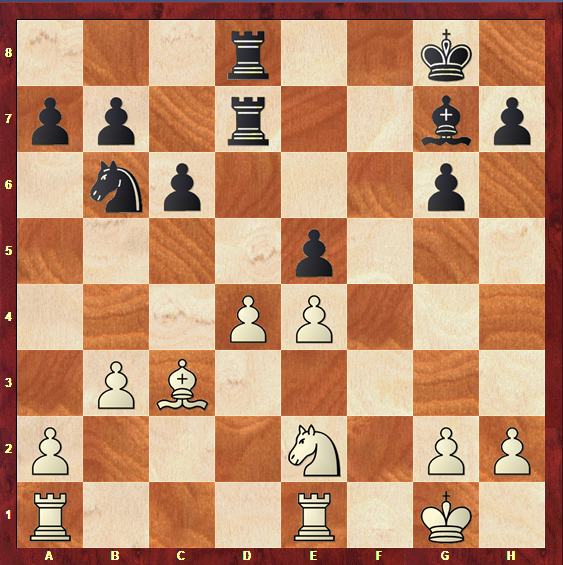
In the following game, we will see a successful …c6-c5 break in the centre. This is a game between the Grandmaster Jon Ludvig Hammer and the current World Champion Magnus Carlsen, in the year 2013.

In this position, again, we have reached our original structure with some additions, such as the g3, the a4 and the a5-pawns.
Black’s position in quite solid, and so is White’s. Black managed to place his Rook and Queen on the semi-open d-file, putting pressure in the centre. Besides that, he also succeeded in exchanging pieces, which in good for him, decreasing his space problem: it is always a good idea to exchange pieces if you have less space than your opponent, as having space is only good if you have pieces to occupy it.
In comparison to the previous game, White lacks pieces to attack and prevent Black’s breaks.
The game continued with:
16.Rfd1 b6
17.Qc3 Ba6
18.Rac8 Rad1
19.Rad1 Qe7

Black is preparing the …c6-c5 breakthrough, and there isn’t much White can do about it.
- h4 c5
- dxc5 Td5
- Rxd5 Nxd5
- Qe5 Qxc5
Black is now fighting for the centre with White. The position is finally equalized, and Black succeeded on his goal of neutralizing White’s activity.
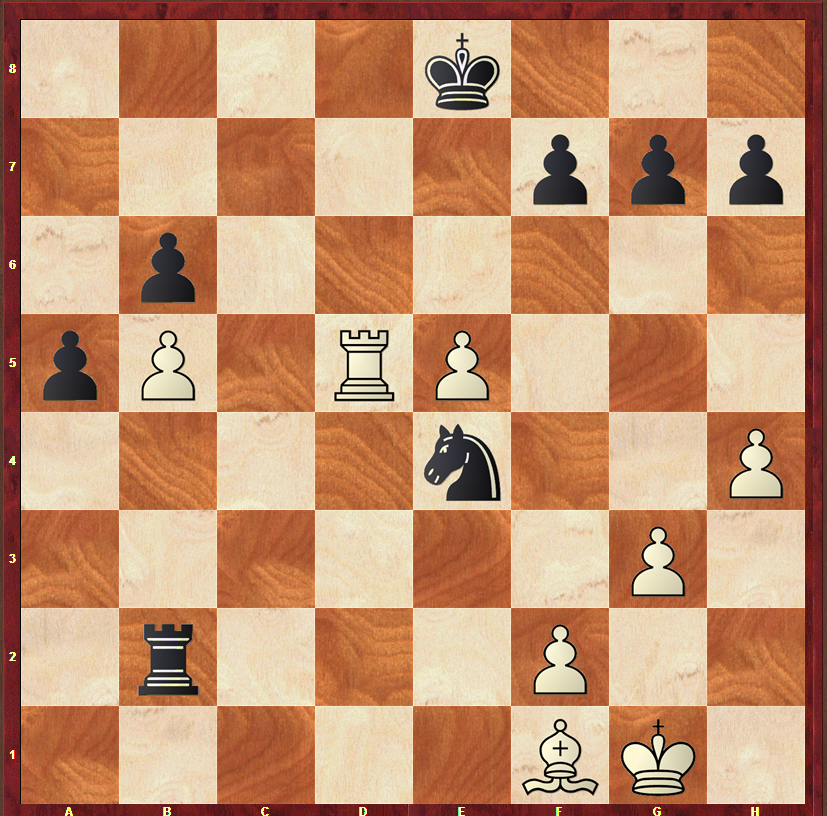
- Bh3 Re8
- Nd4 Kf8
- Bf1 Rc8
- Nb5? Bxb5
- axb5
Unfortunately for White, the b2 and b5 pawns were left weakened. The position is already worst for White, and our World Champion certainly knows how to explore this and transform this position into a winning endgame:
- … Nf6
- Qd6+ Ke8
- Qd3 Qd5
The exchange of Queens is forced and Black reaches a favorable endgame.
- Qxd5 exd5
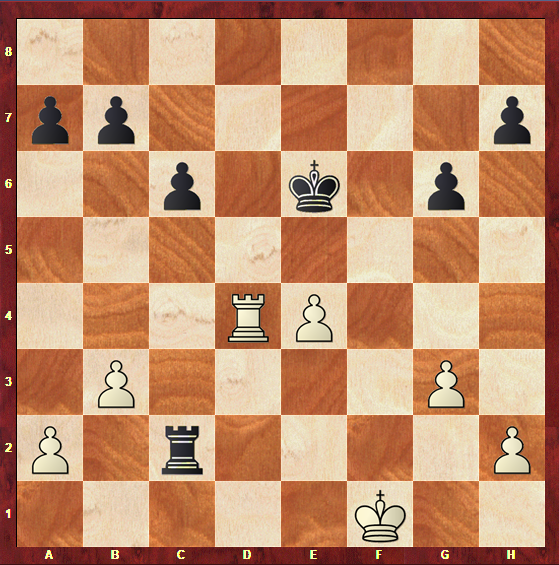
- e4 Rc2
- e5 Ne4
- Rxd5 Rxb2
The position is clearly better for Black, because of the strong passed a5 pawn, which eventually won the game.
- Rd4 Rb4
- Rd1 a4
- Bg2 Nc3
- Bc6 Ke7
- Rd7 Ke6
- Ra7 Kxe5
0-1

The a-pawn cannot be stopped, and, in sight of it becoming a Queen, White decided to resign.
The next game will illustrate White’s idea of advancing the e-pawn to e5, fixing the centre and controlling the d6-square. This game was played in Dortmund 2013, between two extremely strong players: Dmitry Andreikin (White) and Vladimir Kramnik (Black).
- d4 Nf6
- c4 e6
- Nf3 d5
- Bg5 h6
- Bxf6 Qxf6
- Nbd2 g6
- Qb3 dxc4
- Qxc4 Qe7
- Rc1 c6
- e4
This will be the starting point of our analysis in this game. White decided to place the e-pawn directly on e4, not losing the tempo of playing e2-e3 beforehand.
White is clearly ahead in development, and tries to gain a direct control of the centre, as we will see next:
- … Bg7
- e5 0-0

White has fixed the centre and has full control of it. Note that this move is also important in the way that it takes away one of Black’s most common plans: the …e6-e5 break.
- Bd3 b6
- 0-0 Rd8
- Qb3 Bb7
- Be4 Rd7
- Rfd1
In this position all White’s pieces and correctly placed and the development is completed. The d4-pawn weakness (due to being a backward pawn) is hard to take advantage of in practice, since it is difficult to create an attack against it.
Black decided to break the centre with 16… c5, though this lead to an isolated weak c-pawn which eventually lost the game:
- … c5
- dxc5 bxc5
- Qa4 Rd8
- Nb3 Na6
- Rd6
Making good use of the d6 square, that was left weak by the advance of both Black’s c and e pawns. The White pawn on e5 creates this strong outpost right in the middle of the enemy’s field.
White manages to exchange pieces, which is always a good idea when playing against an isolated pawn, as we learnt in the Pawn Structures Fundamentals article.
This will lead to a favorable endgame for White, as Black will not have enough pieces to support his weakened structure.
The game continued with:
- …Bxe4
- Qxe4 Rxd6
- exd6 Qf8
- Qb7 Nb4
- d7
White’s advanced d-pawn starts to get really dangerous for Black. The c5 pawn remains extremely weak.
- … Nd3
- Rd1 c4
- Na5 Rd8
- Nd6

At this point, there is nothing Black can do to hold his position. The game was then easily won with:
- … Qc5
- Nxd8 Qxf2+
- Kh1 Bd4
- h3 Qe3
- Nxf7 Bb6
- N7e5 Nf2+
- Kh2 Nxd1
1-0
Black resigned, as he was going to get checkmated very soon.
In the next game, Magnus Carlsen shows us again that Black in not worst in this structure and that there are lots of ways to find counterplay and equalize the position for Black.
This game will demonstrate both Black’s ideas of controlling the centre with the move …f7-f5 and pressuring the d file and the d4-pawn.
- d4 Nf6
- c4 g6
- Nc3 d5
- cxd5 Nxd5
- Bd2 Bg7
The fact that Black’s Bishop was placed on g7 and not in the typical f8-a3 diagonal has some relevance that should be noted: it is now easier for Black to attack the d4-pawn if the e-pawn advances too much and cannot defend it. Also, when the Bishop is on this diagonal, it makes it a lot more difficult to reach the break …c6-c5. On the other hand, the advance …e6-e5 is more likely to be achieved as it is supported by the Bishop.
- e4 Nb6
The e-pawn has been advanced, leaving the d4-pawn vulnerable. However, White has the control of the centre and is ahead in development.
- Be3 0-0
- Bb5 Be6
- Nge2 c6
- Bd3 Nc4
- Bxc4 Bxc4
- 0-0 Nd7
- Qd2 Qa5
- Rfd1 Rad8
After having completed the development, Black starts to put some pressure along the d-file. The majority of Black’s pieces are active and well-placed, and the position is probably equal.
- Bh6 Bxe2
- Nxe2 Qxd2
- Bxd2

An endgame is reached and this position feels more comfortable for Black: White’s space is no longer such a huge advantage as so many pieces were exchanged. Black’s pressure on the d-file and d4-pawn, however, are becoming more noticeable, since weak pawns are easier to pressure and therefore become weaker in endgames.
- … Nb6
- Bc3 Rd7
- b3 f5

This move clearly challenges White’s control of the centre. Black tries to breakdown White’s centre by undermining the e4-pawn, as the exchange of this pawn would leave d4 even weaker. The …f7-f5 plan works especially well here since Black’s King is not put in danger.
- f3 Rfd8
- Re1 fxe4
- fxe4 e5
Again, undermining White’s centre. There is nothing White can do to hold this pawn formation, and he simply has to take on e5, which leaves him with two isolated and doubled weak pawns. White is now the one who has to fight to maintain equality.
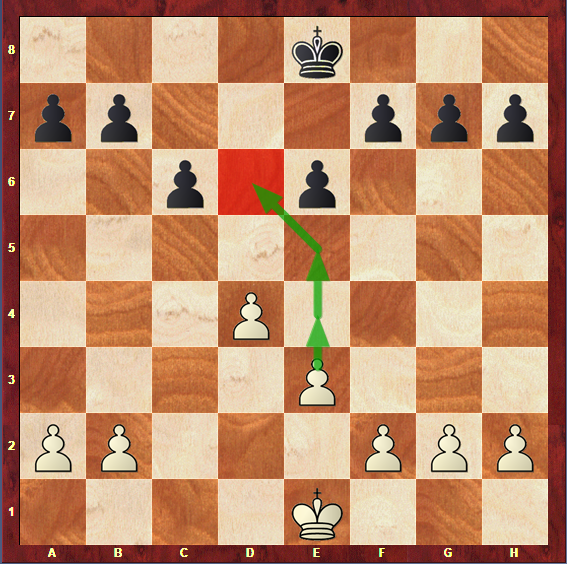
- dxe5 Rd3
- g3
In this position, White should probably have tried Bb2 or Rac1 instead of g3, as this move allows Black to continue as he did:
- … Nd7
- e6 Bxc3
- Nxc3 Ne5

Black is in clear control of the game. The fact that he is losing a pawn is merely symbolic, as the e4 and e6 pawns are so weak that they can surely come to be recaptured. All of Black’s pieces are extremely active and the King is well-placed. White remains passive, his structure is weak, his pieces are poorly placed and he doesn’t control any open file.
- Red1 Kf8
- Rac1 Ke7
- Rxd3 Rxd3
- Rc2 Nf3+
- Kf1 Nd4
- Rc1 Kxe6
- Rd1 Rxc3
- Rxd4 Rc2
The position is much better for Black and the endgame is winning. Yue eventually resigned.
Hopefully, you will now keep in mind some new ideas for Black when playing in this structure. Please note that some of these ideas that worked perfectly fine in an endgame are a lot more difficult to apply in the middlegame: weak pawns are far easier to explore in the endgame, and advancing the f-pawn could, in a normal middlegame position of this structure, lead to an unprotected and vulnerable Kingside for Black.
Finally, we are going to see an example of White’s ability to use his Queenside minority to create weaknesses in Black’s position.
This game was played between Tigran Ghamarian and Mikhail Antipov. It started with:
- d4 d5
- c4 c6
- Nf3 Nf6
- Nc3 e6
- e3 Nbd7
- Be3 dxc4
- Bxc4 b5
- Be2 Bb7
- 0-0 a6
- e4 c5
- e5

Black managed to quickly challenge White’s control of the centre, and because of that White decided to fix it by playing the move 11. e5, gaining a tempo by attacking the knight on f6. The game followed with:
- … Nd5
- a4 Nxc3
- bxc3 c4
Probably an attempt to block the e2 Bishop’s range. However, this results in all Black’s Queenside pawns being under pressure. 13…b4 would have been better, trying to release the pressure, while 13… c4 allows the following:
- Ng5 Be7
- Bf3 Bxf3
- Qxf3 0-0
- Qh5 Bxg5
- Bxg5 Qe8
- Qh4 f6
- exf6 Nxf6
- Bxf6 Rxf6
An endgame was finally reached. This is favorable for White: from now on, any weaknesses created on the Queenside will be a lot easier to explore, since Black will have a hard time defending them.
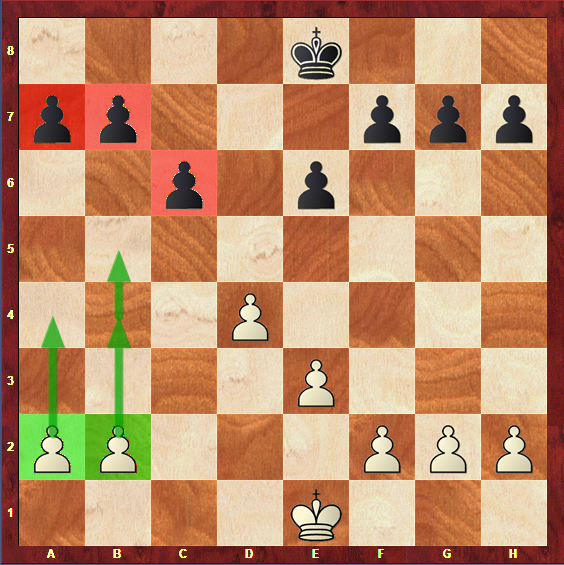
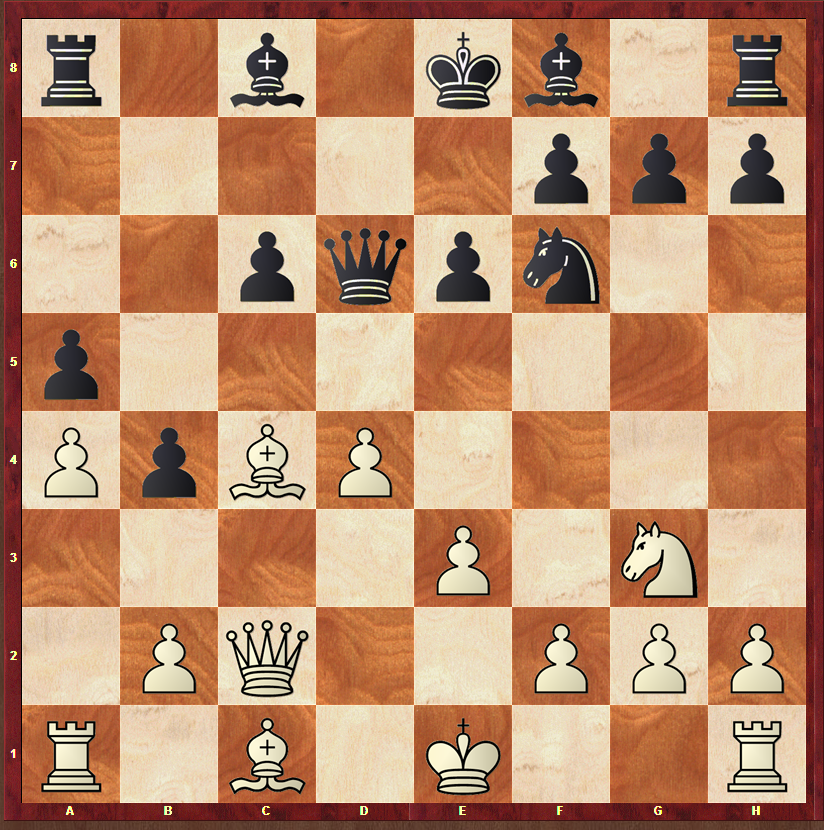
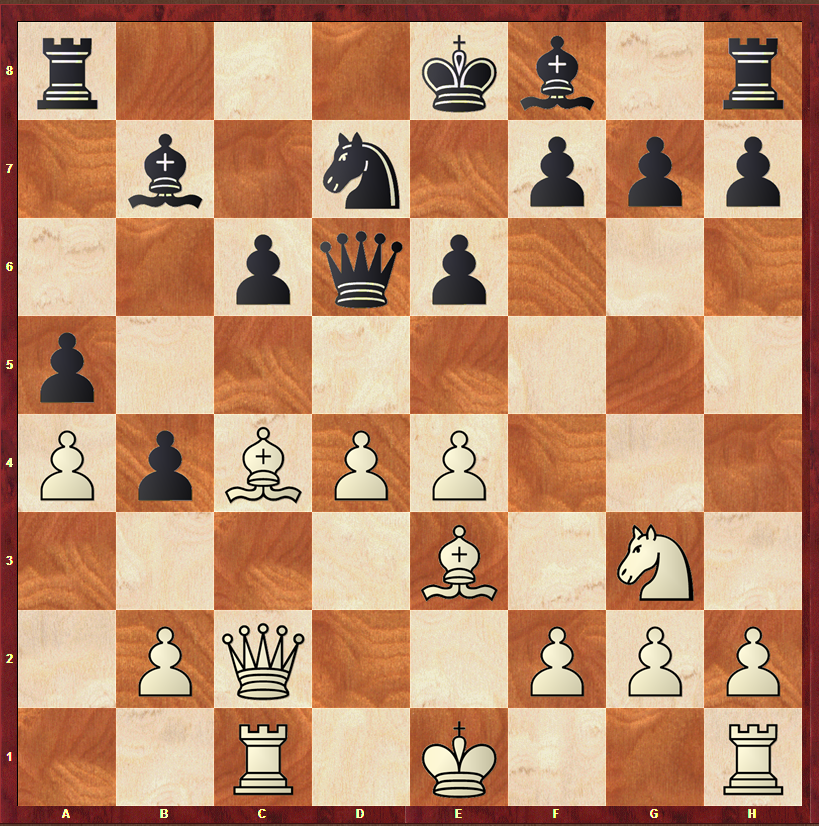
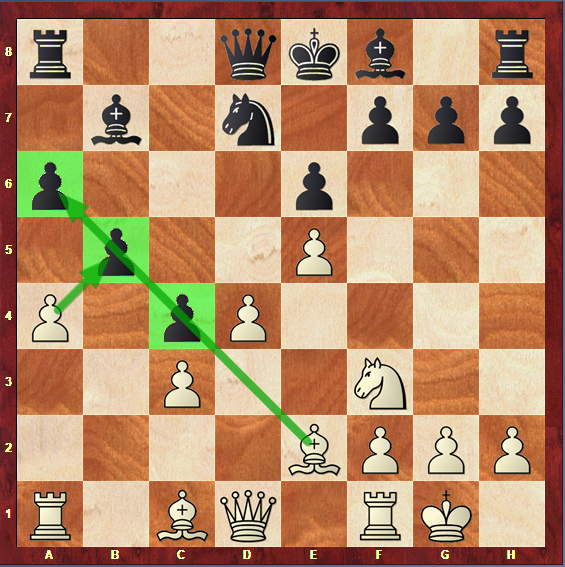
- Qe4 bxa4
Weakening the structure even further. Take a look at Black’s pawns colored in green: they are all weak.
- Qc2 Qc6
- Rxa4 Rg6
- g3 Rg5
- Qa2 Rb5
- Rxc4 Qe5
- Re1 Ra5
- Qe2 Rf8
- Rc7 h5
- Rf1 Ra2
- Qd3 Rf5
- Rc8+ Kf7
- Rc5 Qf3
- Rxf5+ Qxf5
- Qxf5+ exf5
Reaching and endgame with a decisive advantage for White, which was eventually won.
It is important to keep these crucial themes in mind: it is of extreme importance to be very cautious when advancing pawns as it is easy to create weaknesses for your opponent to explore.
In all the above games it was noticeable how small mistakes can compromise the whole game in this kind of positions: they require extreme precision.
We have finally reached the end of this section. Hopefully, when seeing them in practice, you were able to understand better the plans for both White and Black in this position.
Moving on, let’s now see the different ways to reach this structure, so you can also apply in your games all of what you have learned in this article.
How do you reach this pawn structure?
Welcome to the last section of this article: it’s time for you to learn how to actually get this structure on a chess board, so that you can take advantage of what you have learned in your games.
In the beginning of the article, it was said that this structure can be found in games that come from different variations. Let’s start with the most common one – the one that actually names this structure – The Slav.
There are different lines of the Slav that can lead to this structure: basically, whenever Black decided to exchange his d-pawn for White’s c-pawn, this formation is very likely to appear on the board. One concrete line is:
- d4 d5
- c4 c6
- Nf3 Nf6
- Nc3 e6
- e3 Nbd7
- Bd3 dxc4
- Bxc4
One way to get the exact same structure, but with reversed colors, is the Colle System. A possible line is:
- d4 d5
- Nf3 Nf6
- e3 c5
- c3 e6
- Bd3 Nc6
- Nbd2 Bd6
- 0-0 0-0
- dxc5 Bxc5

As you can see, we are talking about the same structure, simply with opposite colors: the plans and themes will be the same.
Another way to reach this structure is with the Grunfeld:
- d4 Nf6
- c4 g6
- Nf3 Bg7
- Nc3 d5
- e3 c6
- Be2 0-0
- 0-0 dxc4
- Bxc4
The only difference in here is the g6 pawn. As you might remember, differences like this happened on the model games: they don’t change the fact that this structure is a Slav formation. They are just some additions that don’t have significant impacts on the plans.
Last, let’s see how to get to this structure with the Catalan:
- d4 d5
- c4 e6
- Nf3 Nf6
- g3 Be7
- Bg2 0-0
- 0-0 dxc4
- Qc2 a6
- Qxc4
Once again, the small alterations do not lead to a different structure, as the globality of the plans is the same.
Those are the most common ways to reach this structure. However, even if these openings never cross your chess board, be aware that there can be a transposition to this structure in any game.
Let’s now sum up everything in this article to make sure it will be remembered in the future.
Conclusions
Congratulations on reaching the end of this article! Now take a moment to rewind the most important things about this structure.
- The most important thing about this structure is that Black has exchanged his d-pawn for White’s c-pawn. This leads to an asymmetry in the pawn structure that results in very different plans for both sides.
- White has a central pawn in d4, which confers him a space advantage that should be taken into account
- White has a majority on the kingside and Black has a majority on the Queenside
- White can try to gain space in the centre or on the Queenside. Attacking Black’s King or going for a Queenside’s minority attack is also an option.
- In order to stop any of these plans, Black should try to break in the centre with either …c6-c5 or … e6-e5. Controlling the centre with … f7-f5 or attacking the d4-pawn and the d file can be valid plans in some positions
- Black has less space, so exchanging pieces is favorable for him
- This structure can be reached by different openings, though the Slav is the most common of all. The Catalan and the Grunfeld can also lead to this pawn formation. You can play in this structure with reversed colors using the Colle System.
You have just mastered another chess structure! Now you are ready to apply this knowledge in your games, and you will surely have good results with this. Keep reading our chess structures’ articles to make sure you understand all of them!